New Server Setup
![]()
This guide contains the steps for setting up and configuring a new server for running the AgWare Chattel Web Application. If you already have the application installed and are upgrading, please see Installing Updates.
Chattel is not a desktop software. It is a Browser based application that needs to be installed on a server running Microsoft IIS (Internet information Server).
The default install for Chattel is c:\AgWare\Chattel. We do not install into the Program Files directory as we do with our desktop application. This is because Chattel modifies files inside the install directory and doing that in Program Files is not encouraged. The files include the application.json file, log files, and report template files.
WINDOWS SERVER SETUP
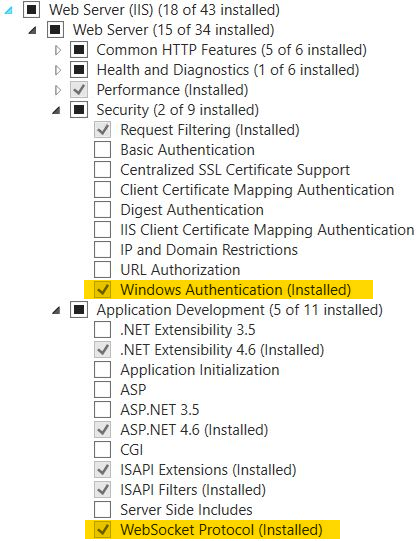
Install IIS using the Windows Server Manager by adding the IIS Role. Make sure to include the Windows Authentication and WebSocket Protocol features.
NET FRAMEWORK
Chattel is a .NET application. However, it is a self-contained application and we do not require a specific runtime to be installed.
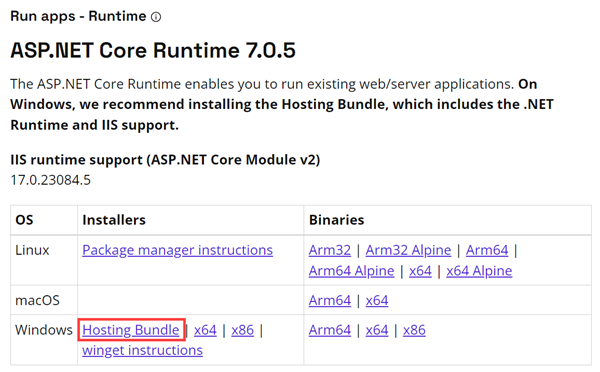
INSTALL THE .NET WINDOWS HOSTING BUNDLE
Install the .NET Core Windows Server Hosting bundle on the hosting system. The bundle installs the .NET Core Runtime, .NET Core Library, and the NET Core Module. The module creates the reverse proxy between IIS and the Kestrel server. If the system doesn’t have an Internet connection, obtain and install the Microsoft Visual C++ 2015 Redistributable before installing the .NET Core Windows Server Hosting bundle.
- Navigate to the .NET All Downloads page.
- Select the latest non-preview .NET Core runtime from the list and click the All .NET x.x downloads. Unless you intend to work with preview software, avoid runtimes that have the word “preview” in their link text.
- On the ASP.NET Core runtime download page under Windows, select the Hosting Bundle Installer link to download the .NET Core Windows Hosting bundle.
Important! If the hosting bundle is installed before IIS, the bundle installation must be repaired. Run the hosting bundle installer again after installing IIS.
To prevent the installer from installing x86 packages on an x64 OS, run the installer from an administrator command prompt with the switch OPT_NO_X86=1.
Restart the system or execute net stop was /y followed by net start w3svc from a command prompt. Restarting IIS picks up a change to the system PATH made by the installer.
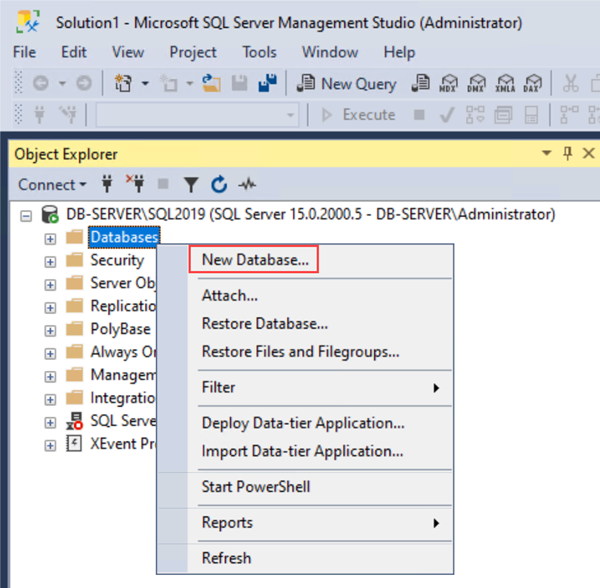
Create a new Database
Open SQL Server Management Studio
- In Object Explorer, connect to an instance of the SQL Server Database Engine and then expand that instance.
- Right-click Databases, and then select New Database.
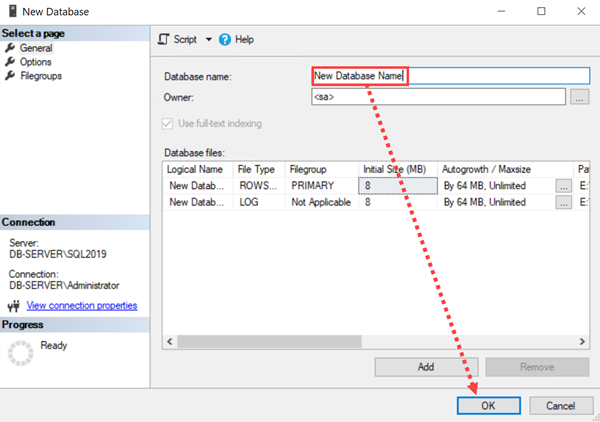
- In New Database, enter a database name
- To create the database by accepting all default values, select OK.
Configure a Chattel instance
Run the AgWare Chattel Installer
Download and run the AgWare Chattel installer from https://agchattel.com/downloads/.
After running the installer open the Chattel Admin Tool either by clicking on the desktop shortcut or it can be located at C:\AgWare\Chattel\Admin.
If you are missing any required components, you will be notified of what is missing.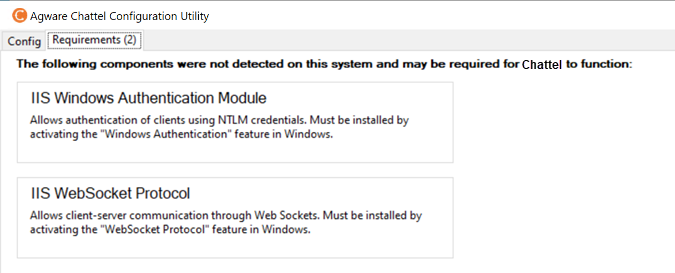
If all requirements are met, the Chattel Configuration Utility will default to the Config tab with a prompt to get started.
Click on Add Application.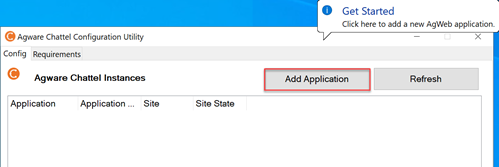
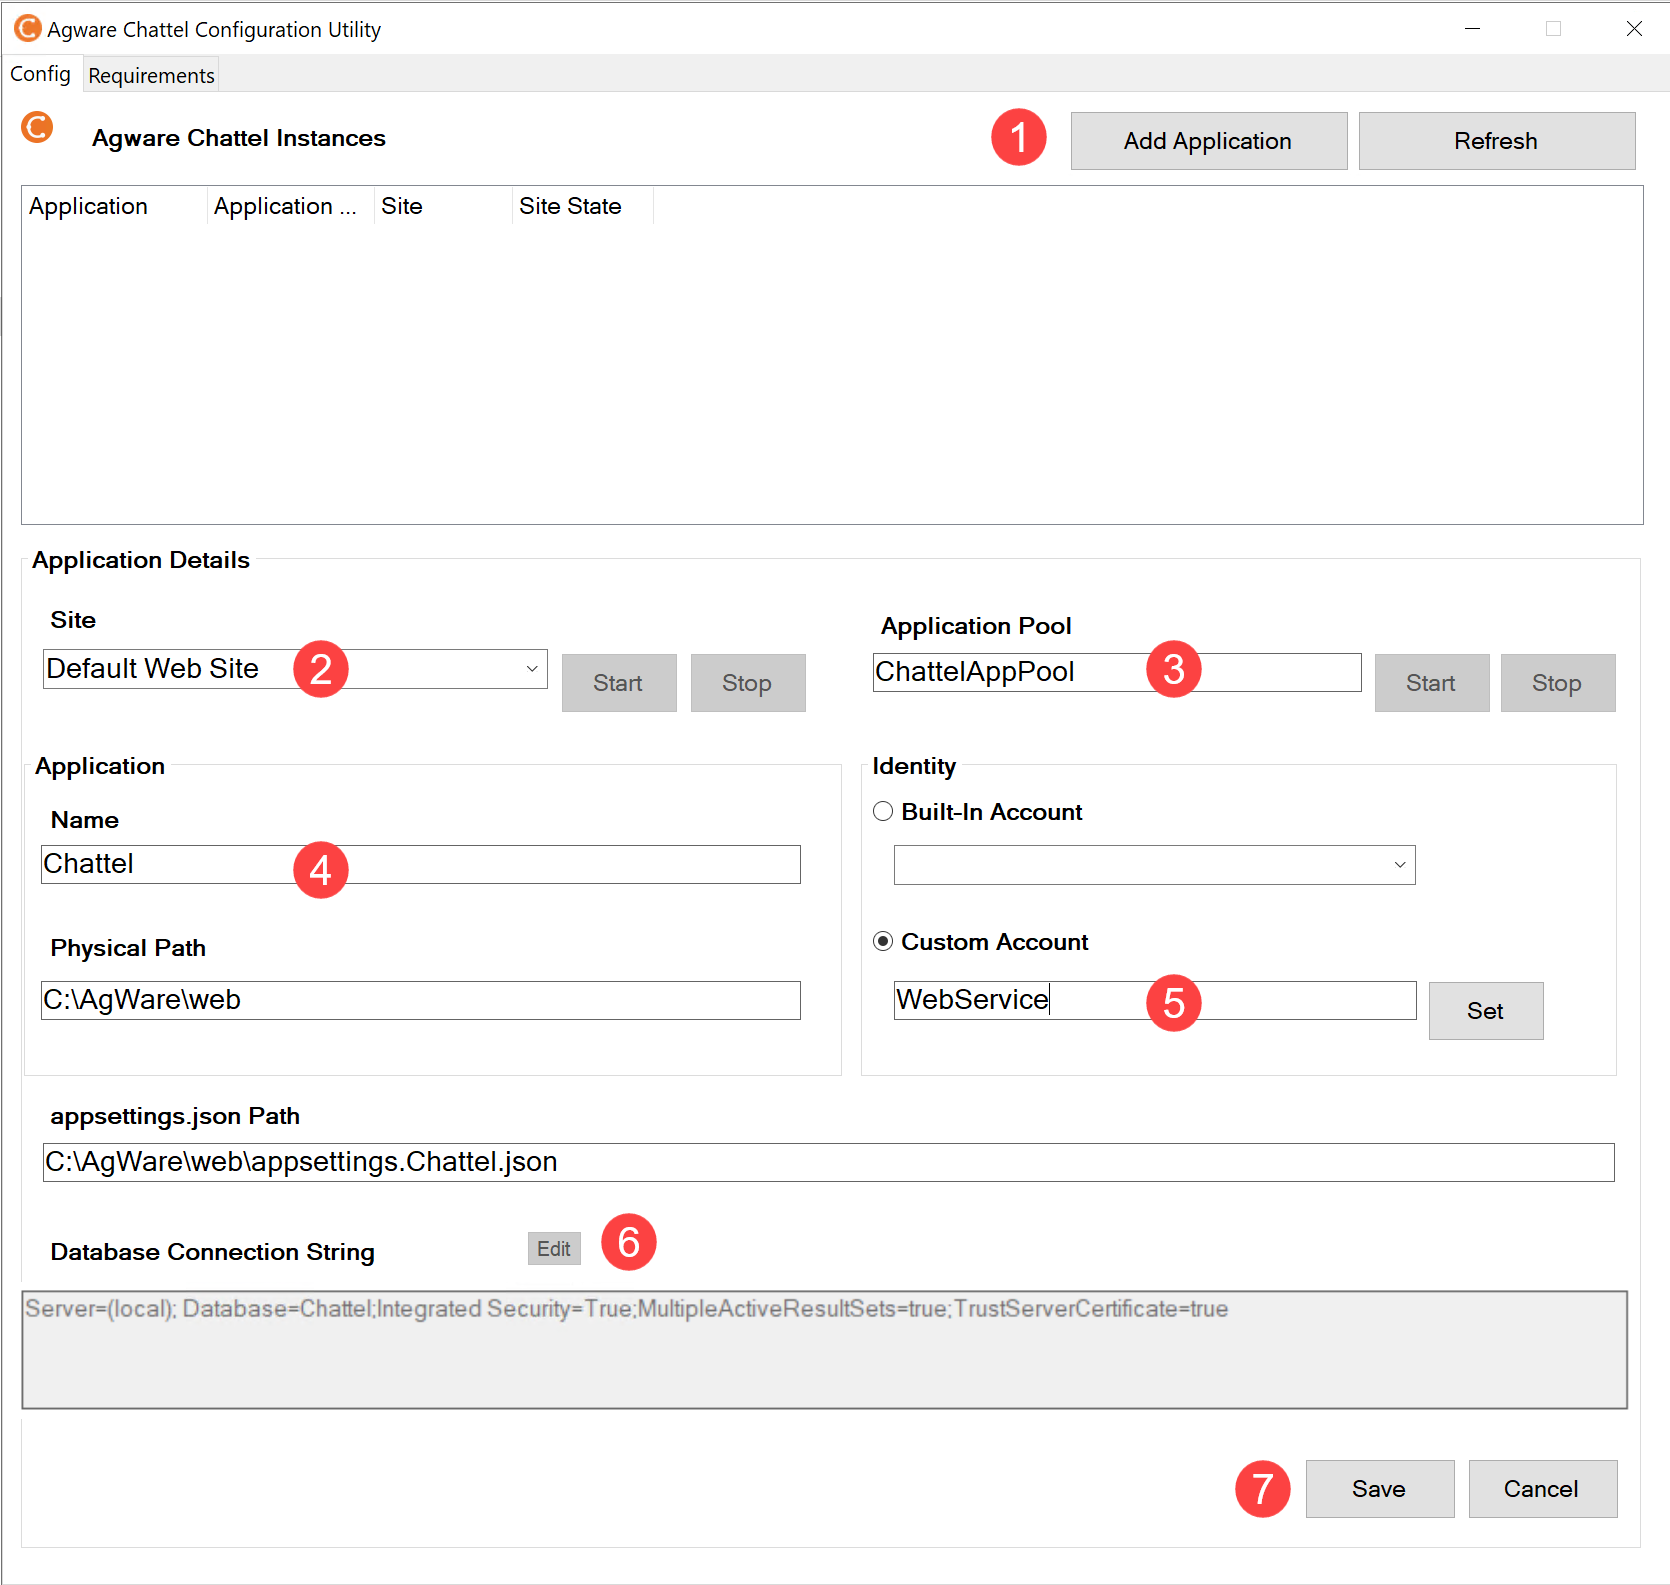
- Add Application - Adds a new instance of Chattel.
- Site - Allows to add the instance to a subdomain or leave it a is for the default website.
- Application Pool - Is the AppPool that this instance will use.
- Name - Is the name of the instance. For the example shown the path to the instance will be https://YourCompanyWebSite/Chattel.
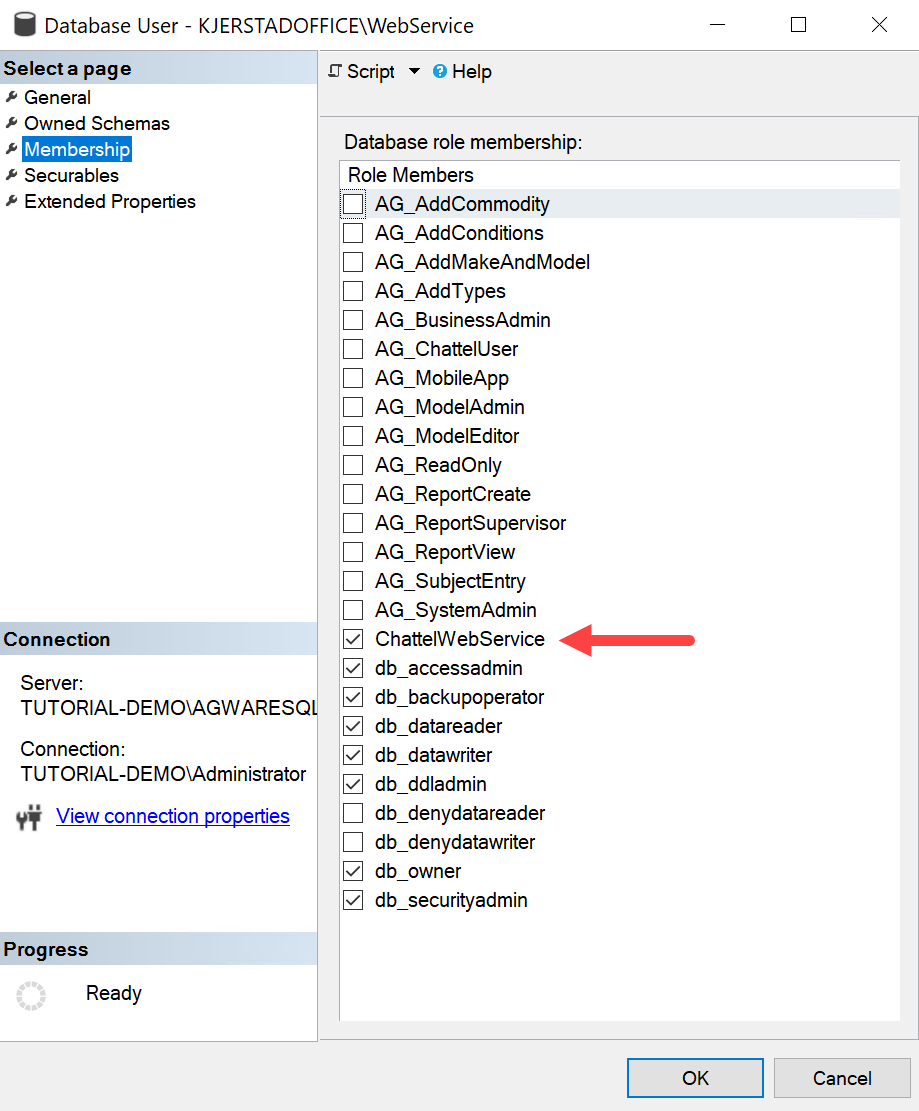
- Identity - Is a user service account assigned to the database with ChattelWebService permissions (See Security). This is the user service account that the instance will run under.
- Database Connection String - Clicking Edit will bring up a JSON file to configure the database string.
- Save - Saves the instance.
Editing the JSON File
Below is the default JSON that is generated with the instance. I have changed:
- Change Data Source to the Server\Instance name (*Note The backslash is escaped by adding an additional backslash).
- Change Catalog to the database name.
- Make any additional changes.
Save the changes in the JSON file and then click Save in the Chattel Configuration Utility.
More info on he JSON file can be found at the end of this article. 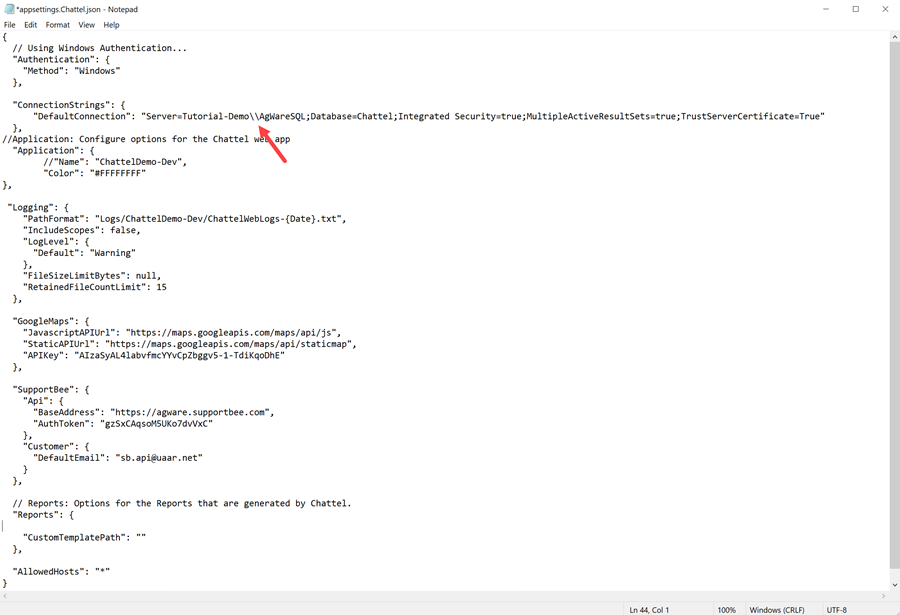
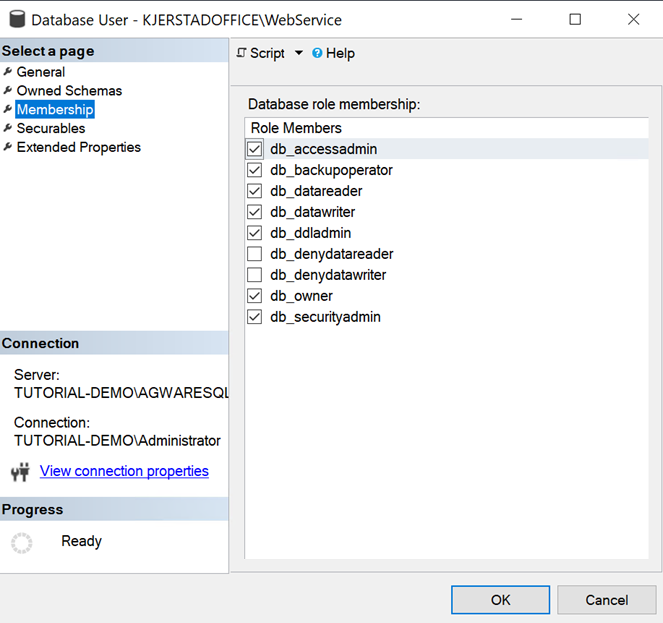
Before accessing Chattel you must add and give db admin rights to the ChattelWebService user on the database.
Access the website though a web browser. The 1st time accessing this will take some time as the tables are being added to the database.
After the tables are updated, give the ChattelWebService user the ChattelWebService permission.
CONFIGURING THE DATABASE CONNECTION STRING
There is an application settings help file at C:\AgWare\Chattel\Web\appsettings.help.txt that is created when Chattel is installed. .
This document has all the possible configuration options for Chattel.
{
// Application: Configure options for the Chattel web application.
"Application" : {
// Name: Optional name to display in the site banner.
"Name": "QA",
// Color: Optional color to use for the site header.
// Accepts any valid CSS color value.
"Color": "orange"
},
// Authentication: Configure options for Authenticating Users within Chattel.
"Authentication": {
// Method: Set the Authentication Method to use.
// Options: "Windows", "Azure"
"Method": "Windows",
// AzureAd: Configure settings for using Azure Active Directory Authentication.
// Applies only if "Method" is set to "Azure".
// See "Chattel Azure AD Setup" guide for details on use.
"AzureAd": {
"Instance": "https://login.microsoftonline.com/",
"Domain": "localhost",
"TenantId": "<Tenant ID>",
"ClientId": "<Client ID>",
"CallbackPath": "/signin-ad",
"ClientSecret": "<Client Secret>"
}
},
// ConnectionStrings: Configure Connection Strings for the database used by Chattel.
"ConnectionStrings": {
// DefaultConnection: The only Connection String currently used by Chattel. Set to the
// Connection String of the Chattel Database.
// Example:
// "Data Source=(local);Initial Catalog=Chattel;Integrated Security=True;MultipleActiveResultSets=true"
// Note: Backslashes must be escaped using another backslash, i.e. there must be 2 backslashes between
// the server name and the instance name.
// For more examples see www.connectionstrings.com/sql-server
"DefaultConnection": ""
},
// Database: Database configuration options.
"Database": {
// Autoupdate: Configure whether or not to have Chattel automatically update the database
// to the latest schema on startup. If 'false', the database will have to be updated
// manually using db-update.exe before Chattel will run.
// Options: true, false
"Autoupdate": false
},
// GoogleMaps: Options for using Google Maps in Chattel. There are currently no options
// here that should be modified.
"GoogleMaps": {
"APIKey": "AIzaSyAL4labvfmcYYvCpZbggv5-1-TdiKqoDhE"
},
// Logging: Options for configuring the Logs Chattel writes to for troubleshooting.
"Logging": {
"LogLevel": {
// Default: The level of detail that Chattel writes to its Logs.
// Options: "Warning", "Information"
// Set to "Information" to have Chattel log more detailed info to the logs. This will
// result in larger log files on the server.
"Default": "Warning"
},
"PathFormat": "Logs/ChattelWebLogs-{Date}.txt",
"FileSizeLimitBytes": null,
"RetailedFileCountLimit": 14
},
// SupportBee: Configuration of the SupportBee API used to submit log files and errors to AgWare.
"SupportBee": {
// Api: Configuration of the API endpoint to use. These values should not be modified.
"Api": {
"BaseAddress": "https://agware.supportbee.com",
"AuthToken": "gzSxCAqsoM5UKo7dvVxC"
},
// Customer: Customization of the Customer information that is sent with SupportBee tickets.
"Customer": {
// DefaultEmail: Fallback email address used by Chattel. This should not be modified.
"DefaultEmail": "sb.api@uaar.net",
// CustomerName: Name that will appear in SupportBee tickets submitted to AgWare.
"CustomerName": "",
// CustomerEmail: Email address of the Customer that is used when submitting tickets to AgWare.
"CustomerEmail": ""
}
},
// Reports: Options for the Reports that are generated by Chattel.
"Reports": {
// CustomTemplatePath: Absolute path to a directory containing .docx files to use as
// Custom Report Templates. If not set, Chattel uses Tempates\Custom inside its own directory.
// Examples:
// \\\\SERVER-NAME\\Documents\\ChattelTemplates
// D:\\Documents\\Reports\\ChattelTemplates
// Note that `\` characters must be doubled-up to work.
"CustomTemplatePath": ""
},
"AllowedHosts": "*"
}